My Favorite Tarp Set Up for a Hammock - Set up tips
Description
People ask me what my favorite way to set up a tarp and hammock is, so here it is, check it out. Our ponchos can be made into a hammock, then over top the PSTL large tarp, 10' x 10', is placed in a way to to give good shelter and still have a nice view. I go step by step on how I set everything up. Check out our gear at wildernessinnovation.com
Tags: Poncho,hammock,tarp,shelter,camping,how to,bushcraft,outdoorsman,winter camp


Video Transcription
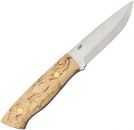
parry peacock careth wilderness innovation I'm uh I get I get a lot of questions people want to know what's my favorite camp set up with the tarp or my favorite tarp setup and we do make targets and make thousand of them and I I like the open so much I only use them on I have two but so I thought well I'll set up a tarp setup it's really my favorite way of doing it I'm gonna use my olive yellow poncho here which is really bright I'm gonna use that as my hammock setup so for contrast and I think I'll use a woodland pstl the large 10 by 10 tarp and I'm going to set it up over it as a shelter and show you what you can do
well I'll I'm about a probably 18 feet apart here between trees and normally if I'm about this distance 15 to 20 feet away or so well getting closer to 20 feet away I usually uh I usually put my lazy string up about head higher so that seems to work pretty good for me so now I just clipped my hammock in I'll be ready I'm just using the 24-inch Dyneema slings and you see where it's sewn right here
all those bar tacks it makes it pretty stiff so what I do is I just fold over an end like that and that becomes my stiff parts that I shoved that in the tube in the I think I showed this on a couple videos but basically I get that down in there I put my little finger do there to hold it so it doesn't pull all the way in and you see em I'm already a third of the way over so all I do now is I just bunch up Sounders bunching up a bunch of stuff here now pull on it there we are so there's my there's my two Dyneema ends and all I do is make I get this part right here
that's my center tab on my poncho I just get that straight down I know I'm on here even alright so I've got my two ends of my runner put that put those through there I take my Dyneema slide the little bead back I shove my Dyneema cord up through the middle of there now at this point you could use you could either use a carabiner which is really simple if you want to go a little more lightweight you can either cut a stick up or you're camping or you can use this is one of our East and aluminum tent pegs this is a six-inch one so I do there they put shove up through there and I stretch my shot cord over the tip and you see shock cord just kind of holds it on there all right I'm gonna put my little spreader in here but I really like it when I'm using these tiny more runners that little bit of spread right there makes a ton of difference in my comfort level sleeping in this thing I chose to use this woodland harpists a pstl 10-foot by 10-foot
it's our large um tarp all right this cords made up in a figure eight same way that we supply it when you get cord from us and for this tarp setup I want to be about five feet off the ground or so cuz my tarp to ten by ten in the back side I want to let hang down and so I don't want to go too high I didn't I didn't mean to walk on it cuz really shouldn't walk over you can damage him you know but we're in the snow so the way we do it is just girls kind of like it's basically like the trucker's not that I've showed some years ago so I'm just gonna go like this and pinch together a little loop okay I'm gonna it's gonna twist it once twice let's say three times two or three times then I take this loop right here with my fingers and I straddle the mainline here and I pull a loop up through that other loop okay you see that makes a little like a figure eight right there so then I just slide that up there and tighten it so I put my free end through here there's my situation right there so now as I pull on this I tighten this hopefully you can see this okay so I get attention to however much I want I can pinch this right there and because partly because of the compounding effect of going through that pulley type deal it's not that difficult for me to hold this thing now all i gotta do to hold it as i just throw it end up over here and basically i just pulling the loop through here okay so now i have a basically a slippery half hitch on there that right there will hold this thing if i need to make an adjustment i just jerk that out of there tension a little bit more do it again to tie it off i'm good it goes alright you see the point where i'm at here here's the end of my hammock right here so i'm out about a foot past that
so I can I can secure this end of the of the tarp and this is half way so it's five feet threaten back so I just shove this tie out tab between that V that was made and I just take a stick like this or I could use Marlinspike whatever but the stick right there I worked fine now and that pulls back when I tighten the other side that's going to pull against there and that will that will secure this end of it right here without having to tie anything else off I just made me they don't bring my bin that had my prusik loops in it so I just made me one out of scrap piece of 550 cord and I just tight an overhand knot in it I'm not getting if I had a fines gonna have a really lot of tension I'd make it up with the stop or knots like we do on our on the prusik loops that we sell that here hits not that much so you throw this thing over you bring your knot end up through here twice and it's important how you address this out because you want to come out of the middle and then you want it to extend on out and I could go I could more I could go more times than that if I want to it gives it more holding power you have to tension it up pretty good at first and once you get it you can pull on that all you want it won't move so I'm going to put the end of this press ik up through the loop on this tarp now they're Chev a stick through here like a Marlinspike now I pull on my press ik I can put a pretty darn good bit of tension on there and that won't slide and it's adjustable so I'm gonna do so that I can I don't need to nail this thing down tight so I can put that through there and leave the stretchiness there that's what I want to do so it's more more adjustable I can do more with it you know I've got some stretch in here which actually helps the tent stakes stay in better and it also keeps me tension on my tarp by having the shock cord is much better than trying to anchor down with some solid cord there's three ways I can use this tent stake so I could nail I could nail down just like that
and that would be fine because I'm on a ridge line which is flexible that other tent stake over there shock corded so it's flexible so I can do just like that it would be just fine but I want to get a little more distance because I'm trying to pull this back away from my hammock a little bit so another way I can do this is I can go through here and then I can put the stake through the loop like I did on the other side and pull it out like that okay so that's that's basically one level of shock cording now I can double that so instead of instead of letting that pass all the way over the tent stake like I did I let it hook in that hook right there so now I have four I have four strands of shock cord instead of two so now I have twice they have twice the tension so I can just do that if I want to but like I say I'm gonna I want to get out here a little
but so I can give myself a lot more a lot more flexibility in this thing so let me go out and find a stick here I think I'm gonna just do one shoulder high right now to start with that no work I can cut it off about right here and all there's a better one over there well it's a little higher I might like it may be a little higher like that I think I'd do this right here all right so here's my loop now at the end of my poles a little bit a little bit too big to go through that loop so I need to trim this down a little bit sure you've seen how I do that sure you've seen that just score a little flying all the way around and that's ready now this wood hair is dry enough an onion usually I use my knife or something my Mora knife for flaking that off of there but about 1-2 deep look at that a little work don't need much anyway there we go I just put that over the top of that peg tip on there I'll pull this thing down with a parachute cord tension it down no I'm pretty good shape here so when you get a tarp from us you get three shock cord pieces like this this is the longest one there's one a little shorter and a little shorter than that so they're 30 32 24 and 18 inches this is 32 it's got a cord lock on it slides up and down so I can adjust the tension and this is exactly the reason that we have these I can shove a loop through here okay so I got the loop here I got the cord lock down here so I passed the cord lock in through the loop pull that up okay now you see right here on this tree there's a little stub of a branch well I can take this cord lock I can run that up there now and tied off to the tree the tree will give a little bit this will give a little bit so I'm so I'm secure without being anchored solidly all right so these tent stakes come with the little 9 inch 9 inch loop of shock cord through the eye there well you can pull that out and you can take one of the three longer shock cords that come with the tarp and you can just fold that over to and I shove that through the little hole here so now I have a long loop that I can use and I really want to use it here I think through my loop tension that down now now you see I can come down to the ground I can be under tension here so there's the one of the uses for these little stubs on here hang up whatever you want on it all right so here I am in my shelter for the snow on me or rain or whatever and I'm pretty well pretty well protected in here if I need to of course I can bring these corners down I can bring that senator stick down a little more to give myself more drainage or whatever but you see I've got a slope everywhere you know I've got a I've gotten kind of like a hip roof going out this way an a-frame my back wall going down here and these because they're going down like that gives a slope for drainage that way so I have good drainage and everything which is one of the reasons I like this I got really nice protection and it's really easy to adjust it to button myself in a little tighter I can do in just a few minutes really I've got a lot of space in here I could have I had a little camp chair or a folding chair that I brought with me I could set set that in here easily I've I've dragged a stump over before and put my guest on there and cooked in the rain or something and be out of all that so I'm you know I'm really comfortable in here it's really nice and like I say plenty of space to be in out of the elements to me this is just one of the most effective ways to use especially our pstl tarp pretty cozy what do you nice out here and this is what I like because I can see out I love to be able to be in my hammock whether I'm laying down or sitting in here or whatever I just like to be able to see out and see the world I'm in man I like to be in the outdoors I like to be able to see it that's what I love about tarps and that's why I absolutely love about this setup
it gives me protection with of you and here we are up inside nice and roomy look how much floor space I got in there I'm not touching I'm not touching this tarp anywhere if I wanted to I didn't put any stake in the middle here I could put a stake down there at the middle and pull this out see a little bit more this shelter I've had it in some pretty they've had it in some pretty good winds before and you know it does really nice around I mean this thing will stay up really nice and a good wind you
About the Author
Wilderness Innovation
"How to" for outdoor camping, hiking activities and survival. Some unique equipment and ideas. "Simplifying Survival" is our motto. Follow us on Twitter - WISurvival
More articles from this author
- Cooking Rice in Vacuum Bottle overnight
- Make a Bough Bed with a Hammock - Convert our Poncho
- Make a Pull Up Tipi with our Poncho Survival Shelter
- New DW Series Poncho - Light - Hybrid Coatings - Strong - Many Functions
- Space Blanket Reflector Shelter 2 of 2
- Good Morning People
- Ben Hendricksen | Wilderness Innovation
- Survival Kit Components Review 2 of 3
- Twig Bundle Fire Starter for Easier Fires
- Edibles: Sego Lily Bulbs Delicious
- Two Poncho Shelter Set Ups
- Fast Deploy Paracord Bracelet
- The Cow Pie Stove Multi-fuel
- Add this to your survival kit
- Quick-Tip: Keeping Dry
- Foam Hat Intro 1 of 3 wet test
- Desert Camp - San Rafael Reef - Little Wild Horse Canyon - Slot Canyon - Petroglyphs - Goblin Valley
- Survival and preparedness my beliefs and history
- Make your own saw out in the Woods
- How to Set up our Poncho as a Hammock in Junipers and PST as Cover
- Make our Tarp the PSTL into a Hammock
- 1st Snow at the Debris Hut
- Winter hike Big Springs
- Build a Raised Bough Bed add Tarp Cover
- Winter Trailside Shelter Quick-Tip
- Quick Tip: Tabasco add to survival kit
- To Mt Nebo Viewpoint & more-Cozy seat from Poncho- Grotto Falls
- My Favorite Spring Rain or Snow Tarp Set Up
- Space Blanket Fire Reflector Shelter 1
- Fire with Flint and Steel
- The Dakota Hole Fire-Covert, Effective
- Easy Mittens - Keep Hands Warm in Fall Weather
- Set up a Diamond Pitch Tarp with our PST
- Build a Super Shelter with our PST
- All Ponchos Lake Camp - 5 ponchos used - demo versatility - Beautiful Lake
- Survival Review components 1 of 3
- Snowshow Tips Kicking in Step n Pause
- Wedge Combo Tarp Shelter - Making it Fully Enclosed
- Sven Saws: Low Effort, Light, and Compact
- Rattlesnake - Quick Tip
- Put Incredible Tension on a Rope with these Knots
- GSI Glacier Cup - part of the OffRoad Survival Kit by Wilderness Innovation
- Survival Kit Bags
- Cast Iron Cookin Midday Breakfast - Camp Cooking
- Fun Fire Science Interesting stuff
- Snow Insulated Bed - part two
- Lake Mountain Solo Desert Trek Part 2
- Make a Tent Line Tensioner w Swiss Army Knife
- Dyneema Knot - Poncho Hammock set up - Multipurpose Poncho
- Quick - Tip: Solar Snow Melting
- Makeshift Apple Crisp at Camp spiced with Tang
- Poncho Lean To with our PSS
- How to Make a 1 Person Floored Bivy with our PST
- Baking Cornbread Muffins with a Zebra Pot as an Oven
- Survival Kit Tip - The Whistle
- Knowledge is Power Audio Program
- Sleeping Pod - 4 Part Set Up - Best Sleep Ever
- A Little Spork Review
- Lodge Mini Skillet - Nice even for backpacking
- Beef and Broccoli over Campfire Nice and warm Under PD Shelter
- Hoodie Pocket Fleece Liner for our Poncho's
- Insulated Hammock Created from Poncho
- Wales Ridge Camp with PST Whelen Tent etc
- Introducing Personal Survival Tarp
- Yukon Chair Super Shelter at Grizzly Gulch
- Poncho Shelter System Components and Set Up
- New Gear Shown in Camp at Wales Canyon
- Camp - Hammocks - Bough beds - Slow Cooking Chicken - Gear Shelter and Platform
- Combine Ponchos to Make Larger Shelter - No Extra Connector Strips Needed
- Survival Blanket Info - Tips - How To - Sizes - Features - Moisture Handling
- Fleece Poncho Liner handles Moisture well
- Cookin' Fun - Egg On Rock
- Pine Ridge Camp
- Poncho Hood Tips and Use of Poncho for Everyday Chores
- Haul out your friggin trash
- NEVER Leave your Survival kit - use our Off-Road Kit-attach to anything
- Osni Cloak Introduction - Coat, Poncho Liner, Woobie, Sleeping bag, Under Quilt and more
- New Canopy Bug Net for the Poncho Shelter System
- Tarp Tips: Double A Frame-add another Tarp-Support Pole Tip
- Backpacking Water Heater
- EZ Spark-Lite Fire w Thistle down
- Zebra Pot Storage and Carry Bags
- PST Tarp Series - Intro what is included - features - set up pics
- Snowshoe hike up Spring Creek Canyon clip 2
- Quick Tie Bowline & Sheet Bend also Tarp Tie in
- Make a Purpose Built Fire - Quick Tip
- Surprise Gift to Me from Shauna
- Survival item - The Scavenger Bag
- Underquilt Sleeping Bag
- Make a Super Shelter on a Diamond Pitch with our PST
- Winter Camp at Huntington
- Wilderness Necklace - yup that's right
- Nano Stove with 2 Person Cook Set
- Urban Materials Cordage Making
- Make a Triangular Sun Shelter from a Square Tarp #28 of 50 set ups
- Cheap water purification using: SODIS
- Edible and more The Juniper
- How to Make 24 oz. Cup Stainless Cup for $2
- 4 Tips for Insulating from Cold Ground - Natural Materials
- Hunting for Obsidian - Desert Camp - Scavenger Bag - Hammock Poncho - Obsidian + Fire Steel Fire
- Starting camp fire with a fire piston
- Whoopie Sling for Poncho to Hammock Setup using our PSS Series Ponchos
- My Four Most Commonly Used Knots for Camp
- Demo Magnesium FireStarter Kit - from our Survival Kit
- Emberlit Stove Review
- Sub Zero Camp with our Blankets No Fire No Tent
- Quick-Tip: Spring Stream Safety
- Poncho - Honeycomb Ripstop - New - Strong - xWide -Intro
- Flint and Steel Fire using green Willow as tinder
- Clean Badly Burned Cup Easily with Fire Remains
- QUICK-TIP - Keep Your Butt Warm
- Make a Paracord Neck Knife Cord
- Silver Lake Fall Trek
- Part 3 of 3 Review of Survival Kit components
- Tarp: Stingray setup over Hammock (PSS)
- PD Shelter Collecting Solar Energy - Parachute Fabric for solar
- Christy uses the Magesium Fire Starter Kit
- MSR Pot Survival Kit
- Poncho makes Recliner Chair also Nice Camp, scones, fun
- Buckhorn Desert - Rainy Winter Camp - Our shelter gear made it nice
- Hikers forced to build shelter
- Don't throw out old fruit, Make fruit leather
- Bury Your Alcohol Stove to Cook in High Wind - Trangia or Other
- Making Chokecherry Bannock and Doughboys
- Quick-Tip: Trail Maintenance - do your part
- Make a Punk Wood Fire Starting Kit
- The Pines Camp Snowy Spring Camping w Tarp Hammock Fire
- 8 Square Tarp Set Ups -Knot and Tarp Tips
- Zebra Billy Pot Now Improved
- Rainy Day Zebra Pot Omelet
- Search for Robbers Hideout - A Cave in the Mountains
- Intro Mini Every Day Carry - review
- Speedy Stitcher Shoe Repair - In the Field
- Box Canyon Camp /Hike also Test Canopy Bug Net
- Osni's first snow - clip of a few of more than 8 functions
- Keep Hands Warm and Useful
- New - The FireBox Stove
- Cozy Winter Camp Cookin
- Garden: EZ Hoe for Fast Weeding
- Quick-Tip - Snowshoeing set a pick for easier traverses
- Review Dr Scholl's Gel Insoles for hiking boots
- Winter Campfire Cooking Steak Rice Country Gravy Sourdough Roll
- Rainy Winter Camp - Parachute Dome Canopy - Sleeping Pod
- Quick-Tip: Quick no mess meal
- Don't Stay Stuck -Take a Shovel
- Cottonwood Camp Shanty Shelter
- Eat snow to stay hydrated? If you are careful
- Real Fire Power-Doan Magnesium-USA made
- Tie the Trucker's Knot
- Lean To Tarp Shelter to Poncho in Seconds
- Carmelized Apples on the Campfire
- Kolob Canyons in Zions National Park
- Osni Hoodie Pocket - also use the Osni for Recon and Glassing - recap of uses
- Easy Dry Shavings for Fire after Wicked Rain
- Heated Poncho Shelter Nice for Nap or Sleep in Cold Weather
- Off-Road Survival Kit Packing and Contents
- Review Dr Scholls Work Gel Insoles and update on videos
- Spring Creek Canyon clip 1
- Simple Pleasures at camp - get off the clock - take it easy - relax
- Using the Speedy Stitcher - Repairs etc
- Scavenge to Survive
- Testing Solar Heating in Mini Parachute Canopy
- Grillin' Trout on the Firebox Stove
- 4 Ways to use a Poncho - Rainy Camp w Bough Bed under Poncho Covered Lean-To -
- Hammock with boughs in it for a Bed and Small Blanket cover for cool weather
- TrueTimber New Conceal Poncho - short clip
- For Hammock Long Hang use Dyneema Cord and Our Poncho/Hammock
- Checkin out the Emberlit Stoves
- Piston Fire and making Fine Tinder from Hard Bark
- Testing Moisture Handling in our Survival Blankets PSB series
- Edibles: Chokecherry great food
- Turn a Poncho into a Hammock - See our Cordage Options - Get set up tips
- The Debris Hut
- Collect sun dried tinder when ground is soggy
- Connect 2 or More Poncho's (PSS) to Make a Larger Shelter
- Alternative Fire Starting Method
- Real Tree Xtra Poncho Makes into Hammock - Tarp - Chair etc
- More Important than Water - Sleep Quality - How to get it - Audio program
- Make a Whelen Tent with a Square Tarp
- Q & A Poncho Tipi Tips - Audio Program
- Tent Stake Tip Using Shock Cord - Our PSTL
- Pole Frame for Tarp Lean To PSTL Tarp Shown Easy Set Up
- Sliding A Frame Tarp Set Up - Quick Deploy if Needed
- Make a Tunnel Tent with PST and willows
- This Really Ticked Me Off - Help Me Stop It
- Batoning with Swiss Army Hiker? Yup
- How to Make a Bridge Hammock out of Our Poncho
- Make the Basic Foam Hat
- How To Make a Yukon Chair out of a Poncho - BONUS - Yukon Chair Shelter too
- Make a Swinging Chair - Shelter it with small Tarp
- Quick-Tip: Keep those Laces Tied Guaranteed
- From our PSS make a Swinging Hammock Chair
- Try A Stove Snowshoe
- Quick-Tip: Trail Safety -Widowmakers
- Wedge Tarp Set Ups - A Lean To with sides - from a Square Tarp - Easy
- Nine Mile Ranch Camp with Shauna - Exploring 42 miles of Indian Art
- Tire Chains - Simple Installation
- Make Our Poncho into a Hammock
- Magnesium Fire Starting 3 Tips for Success - Doan
- Breakfast in the Spring Snow- Beautiful
- Homemade Root Beer with yeast RELOADED VIDEO
- Doan 1 Handed Fire Starting
- Firebox Ultralite Nano Stove - All about it - Audio show
- Parachute as a Blanket for a Hammock - An Accidental Good Idea
- Payson Lakes Fishin Trip - camping - canoe - hammock - survival blanket
- Support 2 Tarps with 1 High Tension Guy Line
- Survival Blanket Bivy Sitting and Cozy
- Trangia Alcohol Burner Remote/ Continuous Fuel Delivery Test
- Snow Caves Survival Blankets Sleeping Shelf
- Snow Camp in Late Summer at 12 Mile South
- Tarps - 3 Easy Tips for Better Diagonal Set Ups
- Lean To with Log Thermal Wall How to build
- Need a tough as nails Poncho ? Check out the HD Series - Built Tough - Cordura
- Passive Pit Cooking | Survival Cooking
- Using the Swiss Army Can Opener
- Make an "A" Frame Tent from a Poncho with stick supports
- Pyramid Canopy Shelter using our PSTL Tarp
- Using AMSTEELBLUE Cord with our Poncho Hammock
- Wilderness Quick - Tip: Cooking add Fruit Leather
- Better Tarp Pitch for Rain - 5 Tips for Tarp Set Ups
- Vacuum Bottle Wheat Cereal easy and good
- ATACS iX HD Poncho Intro tough as nails and looks great too
- Easy Kydex Sheath Adjustment
- Quick-Tip: Bungee Carry Strap
- Twig Bundle Fire with Doan Magnesium in our Fire Starter Kit
- Quick-Tip: Boot Lacing for dual tightness
- San Rafael Desert Lite Trek to Indian Art - camping
- Offroad Survival Kit
- At The Wedges setting up some New Camp Gear - Hunt Camo
- Use Our Poncho and Liner to make a Winter Coat
- 4 Tarp Setups utilizing our Stake Bags
- The Scavenger Bag
- Tough Poncho in True Timber Snowfall makes hammock and tarp too
- Sneak Peek - New Gear Coming
- Night setup, Winter Camp, Hammock Under Quilt & Blanket, Jet Boil
- Use our HD Poncho to Make a Tough Lean To w/Awning
- Tie the Jam Knot - Make a Cozy Bed
- Experimenting with Layered Hammocks and Covers Using our Poncho Shelter System
- WQT Winter Shelter Secret
- New HD Series Poncho Survival Shelter - It's Tough - Intro
- Simple Survival Seasoning
- Prusik Loops Handy Around Camp
- Foam gear preview other hats mittens vest and mukluks
- The Snow Insulated Bed - Nice and Warm
- Making A Backpacking Continuous Flow Water Heater
- Our Poncho and Tarp Colors
- Make a Tipi with Our Poncho the PSSL
- Poncho A Frame Shelter with Our PSSL
- Review of the saw blade on the Swiss Army Hiker - nice!!
- Q-Tip Fire Starting Torch
- Rock Cavity Winter Shelter w Parachute and Blanket
- Camping at The Wedge - Central Utah Desert - Camp Tips too
- Trangia Burner Drink Warmer Modification
- Poncho Solar Super Shelter - Our PSSL
- Poncho Survival Shelter System - The Evolution from a multipurpose poncho to a system
- Snow hike up Hobble Creek Canyon
- Crab Boil under PSTL Tarp Rainy Camp
- Lake Camp in the Quakies - Tip Soft Shackles - HD Poncho - Shelters
- Doan Magnesium - 3 methods of fire
- Make a Dowell Pin on a Pole in the Woods -Bushcraft - Campcraft - Shelter
- Preview Our Poncho Liner
- Edibles:Stinging Nettle Good Nutritious
- Snap together a Hammock, Fleece and Under Quilt using our Poncho
- Guyot Squishy Bowl as Pot Holder
- Quick - Tip: Natures Pot Scrubbers
- A Handful of Canopy Tarp Set Ups and Handy Tips
- Emergency Blanket Survival Shelter
- Duct Tape Fire Starter w/magnesium bar
- Tangle Free Cord Winding
- Snow Hike with the kids and granddaughter
- Chicken Creek w Shauna Exploring, Campfire Dinner
- Poncho Optional Hoodie Pocket and Liner
- Seated Bivy Shelter with our PSSL Poncho
- Fire Starting in Damp Conditions
- Survival without Food - AUDIO Program
- We Test our Tarp, Poncho/Hammock, and Blanket Fabric - It's Tough
- Magnesium Fire Starter Fraud
- Wilderness Innovation- What it is May Surprise You
- No Tent Bough Bed Survival Blanket Camp in Snow
- Fire Starting with Only 1 second of Flame - useful for windy conditions
- Quick -Tip: Jacket Bivy to keep warm
- Organize your Survival Kit - our Tabs make it simple
- Moisture Handling for Tent Tarp Sleeping Gear - AUDIO
- Good Eatin' Try this tip with Ramen
- Whistles for Faster Rescue
- Can mittens and hat be warm when soaked in ice water? watch and see
- Roycroft Pack Punk Wood Fire Kit Poncho Tips Camping
- NEW Under Quilt for Poncho / Hammock - PSB Style
- In an Emergency: S T O P
- Poncho Pistol Carry is Easy inside our Hoodie Pocket 5 11 Velcro Holster
- Camping by Dinosaur Quarry & visit + campsite + setup tips
- Survival Blanket an Introduction to Our PSB - AUDIO PROGRAM
- Make a Water Carrier with a Poncho - Also Gravity feed Water Filter
- Camp Cookin - DIY Red Beans n Rice - Dehydrated Taste Great
- Tarp Tips: Making Do Using Mods
- Quick-Tip Mormon Tea soothing and medicinal
- WI RealSurvival Kit Video 1 Overview
- Testing Our Gear Carry Bags - Protecting your Investment
- Fire Starting with Waxed Rope
- Tree Bark as Insulation
- Double Hammock Tarp Set Up with Our PSTL
- Build A Free Chicken Feeder
- Spring Canyon Winter Camp
- Hammock Converted to Poncho then made into Shelter - quick and easy
- Trek 3 Days without ANY Food (REPAIRED video)
- Canopy Bug Net - How to Tips - Use without a hammock - Shelter
- Camp Cooking - Boiled Omelet
- Quick - Tip: Survival Kit Meds, Allergy
- Make A Floored Bivy From A Tarp - Featuring our PSTL
- Uses for Cylinder Type Gear Bags w MOLLE
- Survival Dental Care
- Quick-Tip Leaves a survival item
- Corona 10 inch Folding Saw Review
- My Old 1980's Snowshoe - Info and Test Run in powder snow
- Excellent Water Handling Properties of the Survival Blanket
- Take A Break - Enjoy the Outdoors
- Rain Poncho Snow use in making Quickie Shelter
- No Cord Hammock Hang - Poncho makes into Hammock - Carabiner use
- Easy Wheat Sprouting nothing special needed
- Fire starting with Magnesium stick and inner bark strips
- Cattails: Add 'em to Your Meal
- Never have cold feet again
- Survival Blanket Under Quilt Sleeping Pod for Hammock
- Single Willow Tarp Setup with our PSTS
- 1st Spring Camp Trek using our Gear
- Bug Out Family Style
- Make a Tripod from Our Build-A-Grill Kit
- Save $$$ Refill Propane Cylinders its Easy
- The Twig Stove
- Off-Road Survival Kit with shoulder strap for hiking
- Willow Framed Tarp Shelter No Cordage Needed
- Enhance SODIS water purification: heating
- Canoe Camp at the Lake
- Quick - Tip: Use weeds for shelter and comfort
- Hammock from a Poncho How to Get a Great Nights Sleep - Tips
- Felling Trees Using Leverage
- Make Warm Mittens it's Easy
- Bens Fantastic Snow Melter for Constant Hot water in Snowy areas
- Choosing what gear to take and what to leave behind - Multipurpose - Tarp - Poncho - Hammock
- Baking Pie Over Flames Not Coals in a Dutch Oven
- 7 Ways to Use the Doan Magnesium Fire Starter
- Two Tarp Combo Set Up with Our PST
- Quick - Tip: Lip Balm n T shirt fire
- Use Matches-Tip to make better burning
- Testing Personal Size Dome Canopy
- Doan Magnesium Lights Tire Rubber
- Making the Twig Stove - excerpts from 21 minute video
- Quick Tip - Dry Tinder in Snowy Woods
- Keep Parachute Cord Untangled
- Lake Mountain Solo Desert Trek - Audio Program
- Make a Wilderness Couch
- SuperWarmMukluks intro
- Smokeless Cooking inside Shelter
- Old Twig Stove Dissected how its made
- EZ Peach Cobbler on the Twig Stove
- Fall Camp Clothing - What I Do
- Quick - Tip: Lichens fun way to eat 'em
- How to Make a Tripod from a Build-A-Grill Kit
- The New Twig Stove Maiden Voyage
- OffRoad Survival Kit - Hot Chocolate
- Enhanced Survival Kit
- 3 Function Personal Survival Shelter
- Make a Leaf Blanket using our Slider Bug Net
- Convertible Tomato Cages: How to Make
- Add 1 item to Ramen - tastes great
- Make a Seated Bivy for Cozy Rest or Recon
- Spring Bike Camp in Rain w Tarp Hammock Blanket
- Caching Water on the Desert
- OD Green vs Ranger Green New HD Poncho color
- Fire with Rope - Also Testing Conduit Legs for PD Shelter
- NEW Multifunction Gear Bag - Bug out with this
- Fire Starting Tip - Using a Trangia Spirit Burner
- Don't get lost - Mark your way
- Green Willow Fire Backstory - flint & steel AUDIO
- How I "Process" Firewood - Simple - Tips
- Eight Lakes Trek - several early fall days in the Mountains
- Custom Soft Shackle + Whoopie Sling + Poncho makes Hammock
- Hood option for our Poncho Fleece Liner
- Spoon Carving A Campfire Hobby
- To Survive - Just Flip that Switch
- An Interesting Find Near My Camp
- Heated Poncho Shelter
- Edibles: Thistle Abundant Food Source
- Testing Tree Straps with Our Poncho / Hammock Set Up - Sleeping arrangement
- Make Yukon Chair from Our PSS
- Cleaning Up Camp - Make a Broom
- Optimus Svea 123 Stove after 25 yrs - test
- Lodge Cast Iron - Cookin Steak Peppers Mushrooms w Cookin Irons over a campfire
- Staying Hydrated in Winter
- Eating Raw Stinging Nettle also Thistle a Trailside Snack
- FireBox Folding Stove More Cool Stuff to do
- Camp Breakfast - Grits Redeye Gravy Ham Biscuit in Whelen Tent
- Winter Water without Stove or Fire
- Three Handfuls Fire Starting - Simple - Spring in the Desert
- Winter Hyrdation Tip - Hot Water
- Campfire Cookin Sticks
- Quick - Tip: Don't lose your Gear use lanyards
- Baked Chicken on Campfire w Build A Grill Kit
- Punk Wood Winter Fire Starting using sparks
- Duck Fork Camp w Osni Bag etc
- Snowy Canoeing Camp - Scouts - Osni Cloak - Tips
- Unusual Tarp Part Two - Raised Bed Mattress - Expansion Space in one step
- Quick Shelter in Small Dense Brush Unedited Setup
- Red Rocks Camping in Utah - Explore - Cook - Camp - My Life
- Unusual Offset Tarp Set Up offers extra protection - uses square tarps
- Poncho Shelter System - Part One
- LIve Shelter Set Up - Quick - Unedited set up - Poncho Shelter System
- Putting the Osni Cloak to Work at Camp
- Live Shelter set up on Hard Rocky Slope - Unedited setup
- Tarp Accessory Kit for Ponchos - NEW
- One Handed Shelter Set up Unedited - Not Staged
- Hammock Kit for Ponchos - Shuttle Sling - Winter Hammock Setup
- Roomy Poncho Shelter Lean To - perpendicular layout
- Blizzard Bivy - Local Materials + Poncho Shelter
- No Man's Mountain - Desert Trek - Beautiful Views
- Why Figure 8 Cord Wrap - How To Make a Jig at Home - In Field
- Horseback into Black Box Canyon - Desert Trek - Utah
- New Locations New Products - Exploring the Desert - Product Intros
- Winter Camp Experiments - Fire - Super Shelters - No Tent
- Cold Feet - 8 Tips for Using Our Survival Blankets
- Live Set Up Poncho Shelter at Salt Creek
- Get the most out of Poncho Shelters Tips - Slings - Blanket Pod - Bug Net
- My Truck Long Drawer Gear Organizer
- Snow in the Red Rocks of Utah - Camp - Insulated Hammock - Passive Cooking - Scenery
- The BEAST in a Hammock - Don't even think about getting cold
- The Amazing Fleece Poncho LIner-7 ways to use it
- Rocky ground and wind - set up The BEAST sleeping system for comfort
- THE BEAST - Comfort on the Ground - Integrates our Gear
- Overlanding Peacock Style - Exploring the Utah Desert
- Delicate Arch Trek at Mexican Mountain - Camping - Cooking
- Cedar Mtn Camp - Rainy - Hammock - BEAST - Cooking Brownies on Fire -
- Simple Nesting Cookware - Fire Bundle - Night Camp
- Dyneema Hammock and Poncho and Tarp - Test Project - Cuben Fiber
- Stingray Tarp Set Up for Hammock - Unusual set up - Poncho is Hammock
- Campfire BBQ Ribs - Tarp Canopies - Cedar Mtn Camp part 2
- Sids Mtn Hike and camp - Beast Sleeping Pad on the Rocks - Desert Beauty
- Ultralite Poncho Shelter set up in wind - Silpoly w Dyneema Tarp Kit
- Poncho for a Seated Bivy - Mobile Shelter - Personal Size Tent - Add Liner to Insulate
- Beat Your Hammock / Poncho With a Stick - would you? HD Fabric
- Tandem Beast Sleeping Pads and Tarp - Makes a Tent - Almost
- Hammock Strap Kit Intro - Ultralite Poncho to Hammock set up
- New Ultralite Tarp Kit for Ponchos - Turn a Poncho into a Tarp
- Camping - Make Asymmetrical Tarp - Hammock - Dyneema Poncho - Chop Kindling - Fire - Dyneema fail
- Don't Baton a Hatchet - A Hatchet does not need a Baton to Work - Splitting wood kindling
- Night camp w rain and hail - shelter and cooking - Current berry pancakes
- Hammock to Shelter Conversion - Poncho to Hammock to Tarp - 3 minutes
- Buckhorn Viewpoint Camp Spectacular Scenery Solo Camp San Rafael Swell
- Dyneema Poncho Project Testing to Failure - VLOG
- NEW Ultralite Rectangular Tarp - Wild Chokecherries - Test Hammock Clip
- Basic Hammock to Pup Tent Conversion - How To - Use Multipurpose Poncho
- Camp in a Borrowed Jeep - Rainy night - Ultralite set up - My Thoughts
- How to Use Paracord to Make a Hammock from Our Poncho - Sleep Pad set up
- Unusual Way to Use a Tarp Over a Fire - The Beast Sleeping Pad Set Up
- Setting up The Beast Sleeping System in the Wind - Sleeping Pad - Cloak Blanket - Poncho Tarp
- Trouble on Solo Remote Desert Camp Stranded - Things OK until
- How to choose a Poncho Size - Customized Poncho / Hammock / Tarp Combos
- New Hi-Tech Fabric for Poncho / Hammock - Very Strong yet light - Not Dyneema
- Setting up a Hammock after Midnight Using a Poncho, Beast, and Osni Blanket
- Bikepacking High Altitude - Simple Light Gear - Multipurpose
- Torso Beast - the ultimate small factor sleeping pad
- Ultralite Poncho not just for backpacking - Multipurpose Poncho hammock tarp
- Making Mormon Tea or Indian Tea - A Brewed Sun Tea
- Breakfast Bagels at Buckhorn Draw - Love Camping on the desert
- ATACS iX & MARPAT camo Ponchos added to our Ultralite line Multipurpose - Tarp - Hammock - Shelter
- Fall Camp on the Skyline - Just for Practice - and a Nap in the Rain
- Search for Assembly Hall Peak - Solo Camping on the desert - Utah
- Making Wild Chokecherry Syrup at Camp w Shauna - Cook Roast - Sleep Set up
- Camping Jeeping with my Sister on Utah Desert | Campfire Calzones
- Raspberry Turnovers | Campfire Cooking | Solo Camp | Cast Iron
- Camp Overlooking Spectacular Utah Canyons | Versatile Sleeping Gear | VLOG intro
- Poncho for Blizzard Protection | Add liner for added comfort
- In a Blizzard, Shelter in Vehicle | How to Get Comfortable | Preparedness
- Ponchos For Tall or Big People | Works as Hammocks or Tarps too
- We Don't Puff -- What is warmer? Quilt or Non Quilt